This guide explains how to configure CyberGhost VPN with Kodi on a Linux device using the VPN Manager for OpenVPN add-on.
Note: This guide doesn’t apply to LibreELEC or OSMC. If you use either of those, see the relevant guide in the CyberGhost VPN for Kodi section.
Jump To…
- Step 1: Configure an OpenVPN Connection
- Step 2: Install OpenVPN and Network Manager
- Step 3: Get VPN Manager for OpenVPN
- Step 4: Install VPN Manager for OpenVPN
- Step 5: Configure VPN Manager for OpenVPN
Disclaimer: We document each step as carefully as possible, but this process requires some technical knowledge. Interface options, firmware behavior, or setup steps may change as well, so check your router’s documentation if something doesn’t match the instructions.
Step 1: Configure an OpenVPN Connection
- Log into your CyberGhost VPN online account with your username and password.
- Select the VPN from the left-side menu and select Configure Device next to Manual setup.
- Now create your server configuration, as described below:
-
Protocol: Select the OpenVPN protocol you want to use: UDP or TCP.
- OpenVPN: The UDP default option can provide faster speeds than TCP, but it may cause interrupted downloads in some cases.
- OpenVPN TCP: Can provide more stable connections than UDP, but it may run slightly slower. Choose TCP if you experience recurring connection issues, such as sudden disconnections.
- Country: Select the country you want the VPN to connect to. You can choose one location per configuration.
- Server group: Select an appropriate server group for your use case.
Once done, click Save Configuration.
- You’ll be taken to the VPN tab. Click View next to the configuration you created.
- Take note of the following:
- Username: The username generated for this configuration. This isn’t your regular CyberGhost account username. It only authenticates this manual configuration with CyberGhost’s servers.
- Password: The password generated for this configuration. This isn’t your regular CyberGhost account password. It only authenticates this manual configuration with CyberGhost’s servers.
Important: Please keep your username and password obtained during the configuration process at hand; you’ll need them later in the setup.
- Next, select Download Configuration to download the configuration file to your computer.
The saved config contains the following files:
- ca.crt: This is the certificate of the certification authority.
- client.crt: This is the user certification file.
- client.key: This is your private key file.
- openvpn.ovpn: This is your OpenVPN configuration file.
Step 2: Install OpenVPN and Network Manager
Note: This guide uses apt-get commands, which work on Ubuntu and Debian-based distributions. If you use a different Linux distribution, the package installation commands may differ, but the overall process should be similar.
- Go to Menu > Software Manager.
- Search for OpenVPN. Install these packages:
- openvpn
- network-manager-openvpn
- network-manager-openvpn-gnome
Then install psmisc via the terminal. This package includes the killall command, which is required for this setup.
sudo apt-get install psmisc
Alternatively, you can also install or update the required packages from the terminal with these commands:
sudo apt-get install openvpn
sudo apt-get install openvpn bridge-utils
sudo apt-get install network-manager-openvpn network-manager-openvpn-gnome
sudo apt-get install psmisc- Log out and in again or restart your computer or open a terminal and type in the following command:
sudo restart network-manager Step 3: Get VPN Manager for OpenVPN
VPN Manager for OpenVPN is a Kodi add-on that manages your VPN connection from within Kodi. It’s distributed through the Zomboided repository, which you need to install first before you can install the add-on itself.
- Download the complete Kodi VPN Manager repository. Don’t extract the repository ZIP file. Kodi needs this file in ZIP format to install the repository.
- Copy the repository ZIP file to an external drive or a folder you can access from Kodi.
- Extract the CyberGhost VPN configuration ZIP file you downloaded earlier.
- Copy the extracted CyberGhost configuration files to an external drive or a folder you can access from Kodi.
Step 4: Install VPN Manager for OpenVPN
- Open Kodi and go to Add-ons. Select Install from the zip file and click the folder where you saved the repository zip file. Select the repository zip file and click OK.

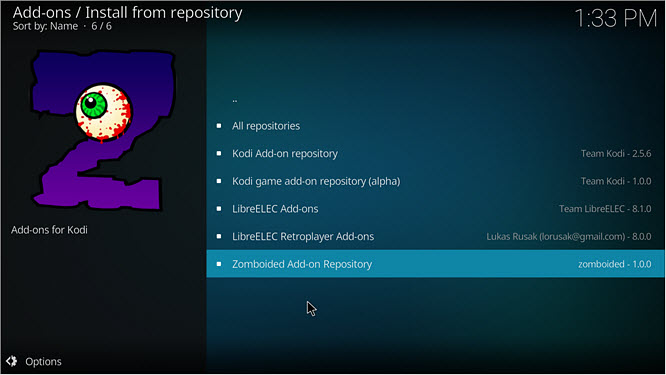
- After the repository installs, select Install from the repository and click Zomboided Add-on Repository.
Step 5: Configure VPN Manager for OpenVPN
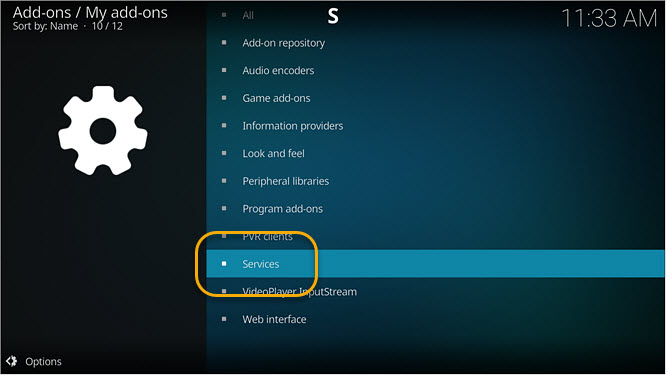
- Select Services.
- Select VPN Manager for OpenVPN.
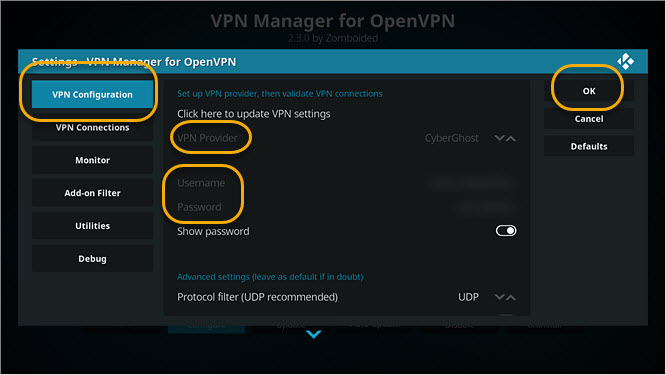
- Click VPN Configuration and set VPN Provider to CyberGhost VPN. Then, enter the OpenVPN username and password for the CyberGhost VPN configuration. Don’t use your regular CyberGhost account username and password. Click OK.
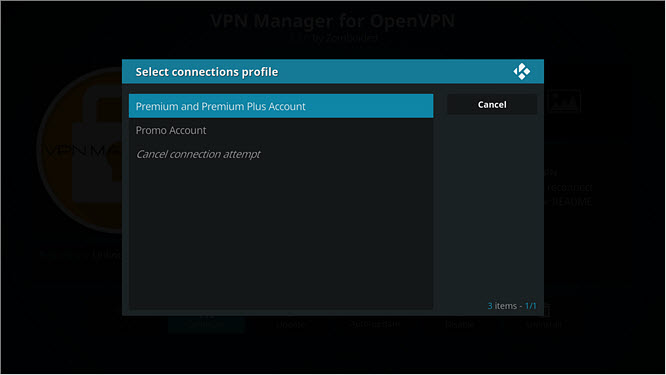
- Select the connection profile that matches your subscription:
- Premium and Premium Plus Account
- Promo Account
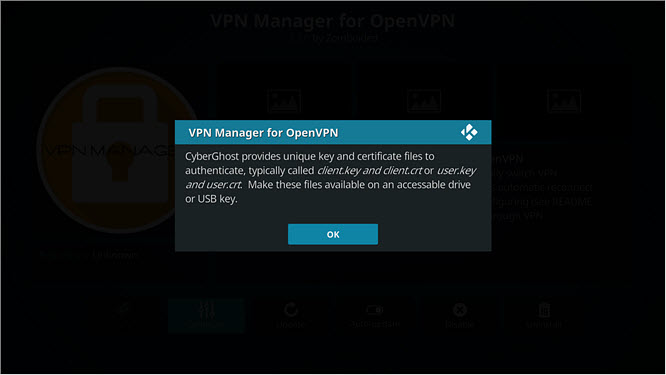
- Click OK and select the client.crt and client.key files from the CyberGhost configuration files you extracted.
- Wait for VPN Manager to connect to the VPN.
If the VPN doesn’t connect automatically, go to the VPN connection tab and start the first highlighted connection.
Troubleshooting: Zip File Not Appearing in the File Manager
If the repository .zip file doesn't appear when browsing from within Kodi, try the following:
- Make sure you saved the file to a location that Kodi can access, such as your home folder or desktop. Avoid saving it to a downloads folder that may be hidden.
- Check that your file manager is not filtering out .zip files. Some file managers hide certain file types by default.
- Try copying the file to an external USB drive and accessing it from there. Kodi can usually browse USB drives without any issues.
Need assistance? Contact our Customer Support team:
- via email at support@cyberghost.ro
- via online request at https://support.cyberghostvpn.com/hc/en-us/requests/new
- via 24/7 Live Chat by clicking the Support button below
Comments
0 comments
Article is closed for comments.